Well, here is a rather detailed step by step of finishing up my painting of an escaped robotic dairy cow from Schoolism Painting in Painter (11) with Ryan Wood, Assignment 6. (Click on any image to see larger) Assignment 3 was to draw a black and white "shiny" (ie hard reflective surfaces) character. Here is my submission:
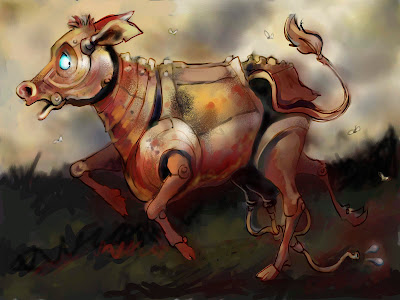
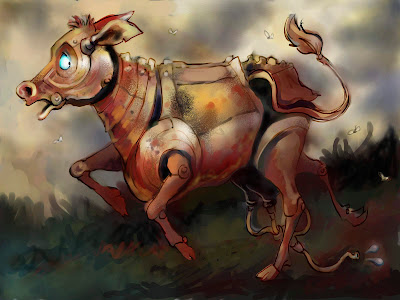
Assignment 6 was to use a visual reference (I used an Andrew Wyeth painting, "Jack be Nimble") for a colour palette and use the mixer palette to paint Assignment 3 "alla prima". Here is my submission:
And here is my visual reference for the coloring:
Before going on to doing finishing work on the painting, I went back and worked on my alla prima painting using tips from Ryan Wood in my video critique:
Here you can see I am using the airbrush to both blur and lighten up the foreground background (does that make sense?) in blue tones to tie in with the cool colors in the eyes:
Here I'm using the airbrush to put in more saturated colour in the transition areas to shadow, using my colour reference as a guide (I realized that my alla prima was quite desaturated and pale):
Adding in very dark red shadows beneath the cow's body armour to make her shape more rounded:
Adding in more saturated oranges and reds, esp to the body armour and the fabric (what should be chain mail) skirt over her hips:
Adding in more cool colours in the shadowed recessed areas of the cow (green airbrush):
Using a washabrusha to put brush strokes into and "mess up" the airbrush application:
Isolating the udder with lasso tool to airbrush more 3D shape into them:
Putting in more cool tones with airbrush, in udder, and background:
Looking at my colour reference, still more darker blue tones to add cool colors:
At this point I pretty much finished the revisions on the alla prima:
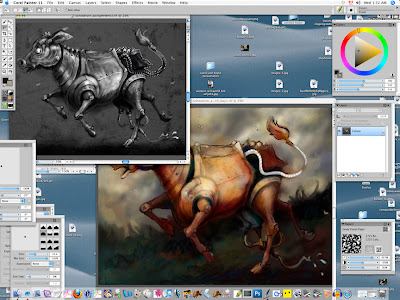
And decided to jump into the instructions on Assignment 9. First thing was opening up our rather detailed Assignment 3 black and white image, making a copy of the image, and pasting it into our new work window for assignment 9:
Then we were to change this new b&w layer into the kind of overlay we felt best worked. Here are my trials:
"soft light" overlay:
"hard light" overlay: (way too dark!)
"hard light" overlay dialed down to 65% transparency:
"overlay" layer type:
"screen" layer type:
"Gel" layer type dialed down to 26% opacity:
"Normal" layer type dialed down to 47% opacity (I dialed down to where I could best see my colour canvas without losing the b&w overlay details):
"multiply" layer type at 47%:
"darken" layer type (26%):
I decided what I liked the best was the "hard light" layer type, and set it at 34% opacity:
Next I copied my alla prima canvas layer and copied it into my document, but left it closed, just to keep as a reference of my original colour work, as I worked on the canvas.
Here I've added another empty layer to work on.
Here I am using the eraser brush to erase unwanted lines and shading on the greytone overlay drawing:
Here I am erasing out the color painting on the metal tail on the canvas layer, so i can keep the more detailed drawing on the black and white tail and color it in:
Here I am using the lasso tool to copy all the detailed drawing in the hip/skirt/tail area in the black and white assignment 3 drawing, that I never painted in in any detail in the alla prima assignment 6:
Pasting that area onto my painting:
Using the eraser to get rid of extra layer that I pasted onto the butt area of the cow:
Here I've copied and pasted the red alla prima layer from the chainmail skirt area over the detailed b&w chainmail skirt:
changing the alla prima red skirt layer to "hard light" overlay so I can see the chainmail through it:
choosing all the overlay layers (chainmail in color and b&w, b&w assignment 3 drawing):
turning them into a group:
and collapsing them into one layer:
adding more color to the chainmail skirt:
I actually had all sorts of issues collapsing the grouped items: some went opaque, some disappeared, it seems that when you have different types of overlays, differing levels of transparency, in layers in a group, some wonky thing happens where upon collapsing one of the adjustments (ie 100% transparency, default type layer) will override all the others. Big problem. To undo I ended up closing the document and reopening. Here you can see I lost my color overlay:
Here I have dropped the group onto the canvas:
To get back my lost red overlay, I went back and reselected it on the alla prima layer and copied it:
And repasted it on:
Here I am touching up the eyes by putting some red/pink in the lower eyeball:
Here I'm using the bamboo pen brush to put in lines that were visible with the added b&w assignment 3 layer, but just barely:
Using the FX pen to put glow in the eye:
using the same glow brush on the armour on the face and neck and shoulder:
Using sable chisel tip water brush to pull together the sky with bristle marks and also the skyline:
Ditto in the ground:
Adding in more creases and texture in the armour wiht a dark orange airbrush to give it more texture that it had in the original b&w drawing:
Copying part of the red chainmail and adding it to the other side of the tail on the hip:
And erasing out the extra pasted red chainmail:
Using Real Soft Colored Pencil brush to add texture of hairs to the tail:
Ditto to her "bangs" on her head:
Using the soft colored pencil to add color to and tighten up the neck armour and details on the body armour:
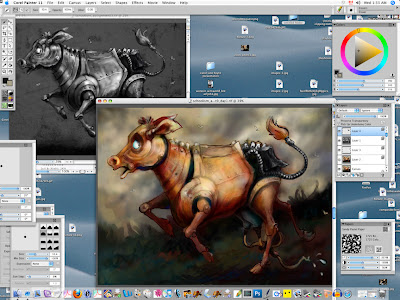
A comparison of the original alla prima painting I started with, and where I was at the end of my first full day of "finishing" work:
Here is the end of Day One of Assignment 9:
Tune in for Day 2 of "Finishing".
skip to main |
skip to sidebar
Blog Archive
-
▼
2011
-
▼
July
- Kristen bell maxim wallpapers without clothes
- Kristen bell In hot Clothes
- Emma Watson Goes To Movie with Friends in Santa Mo...
- Emma Watson candids Santa Monica 7/28/11
- Kareena Kapoor Wallpapers
- Deepika Padukone Wallpapers
- Hollywood Singer Madonna wallpapers
- Pinstriping A Skate Deck By Lost Garage
- The Emerald Collection By Element
- Random Pic of the Day: Sparkly
- Gratuitous Bikini Model Video: Bar Paly
- Emma Watson Lancome preview
- Random Pic of the Day: All We See
- Graffiti Art Coloring Book
- Random Pic of the Day: Not All Things Are What The...
- Random Pic of the Day: Strawberry Yum Yum
- Kristin cavallari bikini pictures without clothes
- Kristin cavallari bikini pics
- Kristin cavallari short hair 2011
- Kristin cavallari twitter
- Kristin cavallari engaged to jay
- Kristin cavallari pictures laguna beach
- Kristin cavallari pictures 2011
- Kristin cavallari photos
- Kristin cavallari pictures
- Kristin cavallari pics
- Rumor: Emma Watson to Design Her Own Line
- Katrina kaif in zindagi na milegi dobara wallpapers
- Katrina kaif in zindagi na milegi dobara
- Schoolism Assignment 9: Finishing: Step by Step fl...
- Schoolism Assignment 9: Finishing: Step by Step fl...
- Justin Bieber latest Pictures Gallery
- Photography By David Sykes
- Random Pic of the Day: Big Gun
- Schoolism Assignment 9: Finishing: Step by Step fl...
- Jennifer Aniston Stylish Clothes In UK Premiere
- Hollywood Celebrity Reese Witherspoon and Jim Toth...
- Bollywood Actress Amita Pathak Wallpapers In Hot C...
- Random Pic of the Day: Where Are We?
- The TSOVET FW 111010 Watch
- Angelina jolie tattoos pictures images photos
- The Coach Bleecker Legacy Leather Stripe Slim Bill...
- Glasses and Key Holders By Art Akimbo
- Random Pic of the Day: Anyone For A Back Scratch???
- Random Pic of the Day: I See You Getting Dizzy
- The Ron Ron House In Costa Rica
- More information on "Beauty" starring Emma Watson
- Anna Faris Pictures
- Anna Faris
- Emma Watson teaming up with Del Toro for "Beauty a...
- Random Pic of the Day: Warhol & Jagger
- Music Monday: Sisqo "Thong Song"
- Aishwarya Rai Wedding Mehndi
- Schoolism Assignment 9: Finishing
- Katrina Kaif wedding pictures
- Katrina Kaif Wedding Photos
- Katrina Kaif Wedding Pics at Bina Kak daughter
- Aishwarya Rai wedding photos and videos
- Aishwarya Rai wedding photos
- Aishwarya Rai wedding photos videos
- Aishwarya Rai wedding pictures photos
- Aishwarya Rai wedding pictures
- Aishwarya Rai wedding pictures gallery
- Aishwarya Rai wedding pictures videos
- Aishwarya rai Wedding Pictures Images
- Abhishek Bachchan and Aishwarya Rai Wedding Pictures
- Images of Aishwarya Rai Wedding
- Aishwarya Rai Wedding Ring Pics
- Aishwarya Rai Marriage Photos Gallery
- Aishwarya Rai Abhishek Bachchan Marriage Photos
- Aishwarya Rai Marriage Trouble With Salman Khan
- Aishwarya Rai Marriage Mehndi
- Aishwarya Rai Shadi Photo
- Aishwarya Rai Wedding Dress
- Aishwarya Rai wedding jewellery
- Aishwarya Rai marriage reception photos
- Aishwarya Rai wedding saree
- Aishwarya Rai wedding
- Emma Watson lands in LAX 7/16/11
- Emma Watson candids in New York
- Cheap Custom Made Bridal Gown Lace Satin Strapless
- Vera wang fall 2011 bridal gowns Amazing Clothes
- Random Pic of the Day: Ouch?
- kim kardashian magazine pictures silver paint
- Kim kardashian hot photo galleries
- Kim kardashian hot photo shoot
- Kim kardashian images 2011
- Kim kardashian images
- Kim kardashian pics in w magazine
- Kim kardashian pics 2011
- Kim kardashian photos
- Random Pic of the Day: Missing Unicorn
- Purple Label Skull Cufflinks By Ralph Lauren (7 Pics)
- Scarlett Johansson Hot Figure Pictures
- Scarlett johansson hair 2011 oscars
- Is scarlett johansson dating sean penn
- Scarlett Johansson Hot Pictures While Smiling
- Hollywood Actress Scarlett Johansson Pictures In B...
- Emma Watson on Regis and Kelly
- Skate Toy Soldiers By Steve Nishimoto (6 Pics)
-
▼
July


No comments:
Post a Comment